Final Shot – Controller

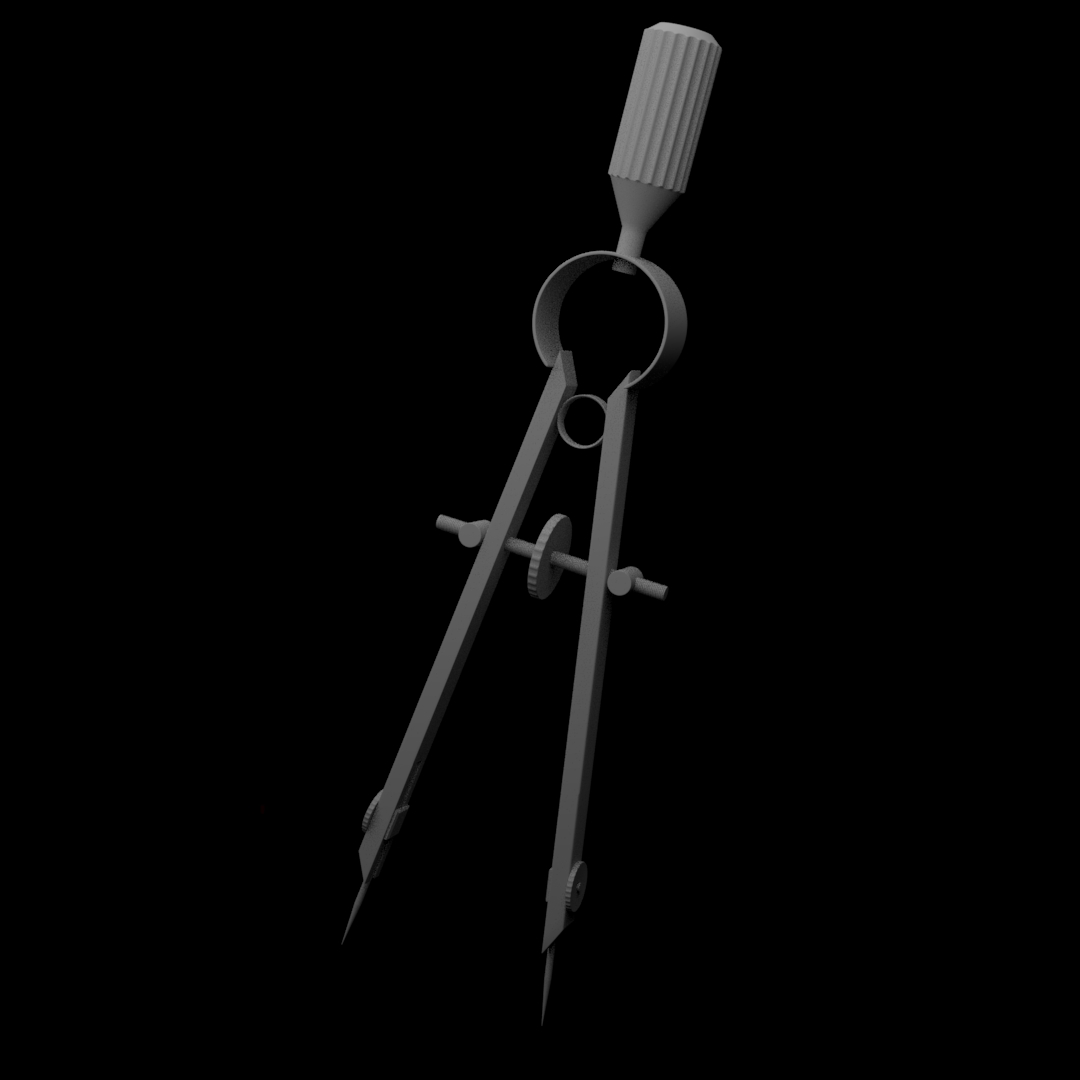
My final model can be found on sketchfab here.

Problems Encountered.

Upon rendering my textured model in Maya, I found that certain edges, especially those around the handles of the controller, were not rendering properly. I had anticipated this problem upon reaching the end of my modelling process as my topology was quite messy, with a lot of triangles in the geometry of the mesh. I wasn’t sure if this was what was causing my lighting problem, so I first attempted to relight my scene multiple times to see if I could remedy this to no avail, I then exported my mesh into blender to attempt to light it there, where I encountered the same problems. I could safely assume at this point that it was my mesh that was causing the problem, but since I had already modelled, smoothed and UV’d the controller, it was too late to start it all over again, as the entire process had taken me around 15 hours in total.

To work around this I decided to use Sketchfab to display my model, as the lighting in sketchfab was working correctly, so I exported my model from Maya as an .fbx so that the animation applied to it would also be contained in the export, I then manually plugged in all my textures into sketchfab, fullscreened the preview and screen recorded the wireframe view, UV view and the final render.

Reflecting upon these problems, my workaround was both a negative and a positive. Negative because it prevented me from compositing my model into a still image, but positive as it was much simpler and of a higher quality when placed into Sketchfab. Overall, the lesson learned from these problems is that the topology of a model is very important when it comes to rendering, and that triangles and ngons will negatively effect any rendering engine.

Showreel Analysis

For this post I want to briefly analyse some other showreels created by either students or those in the VFX industry, the purpose of this being that to take inspiration and generate ideas when creating my own final showreel.

This first showreel is mainly based around 3D modelling & animation, I will mainly be analysing the modelling section, as I do not plan on doing any complex animations for my own showreel.

One of the first things I noticed about this showreel was that he does not list the software used for creating these models, aside from this the showreel itself is relatively simple, the way he displays is models is by having them do a 360 spin with a plain background and one light source directly over the top of the model, he then goes through the wireframe, shaded and textured views. I think this is a very effective way of showing off the models, as there is no other distracting elements to the scene, so the viewer can purely focus on the technical ability on display. This fits in with what I was told by my point of contact at Escape Studios, who also said that a simple rotation of the model would suffice when creating my showreel.

This next showreel is based around compositing, but I will be focusing on the camera projection section so I can get some ideas for displaying my own camera projection in my showreel. The software used for this shot is Maya.

The first section is the final render of the scene, the camera does a quick pan and rotate around the scene and is quite effective in showing the 3D element of the scene. For the breakdown it goes through the original image, the 3D mesh and a pan around the viewport of the projection to show off the areas not visible in the render. For my own final showreel I plan on heavily using photoshop to display the work that goes into my projection, so as well potentially including some of the shots used in the above showreel, I will also try to transition through the different layers I make in photoshop.

This showreel is based around matchmoving, something that I also plan on displaying in my own showreel. The software used for this showreel is 3D equaliser and Maya, slightly different to my own plans for matchmoving, as I plan on using blender for compatibility reasons.

The way the shots are displayed in the reel are by first using cones to show where the tracking markers are in the scene, then using a checker pattern to cover any objects or surfaces within the scene, I think this is a very effective way of displaying the tracks as it can show off the accuracy of a track very well. One downside to this showreel is that the tracks themselves are not very good, you can plainly see the tracked 3D text towards the end is lifting up from the floor and generally just not following the cameras movement.

Overall, briefly analysing these showreels has helped to get a better picture in my head of what shots I should use when taking all of my final exports and placing them into premiere for my final output this semester.

Camera Tracking Workshop

23795801_1214698312001090_2596370721750572445_n

Earlier this week I attended a workshop with Jon on how to film footage for 3D tracking, which would be one of my final shots for my showreel. Overall, there are many things to consider when filming for this specific purpose, the camera we used was a Sony A6300 which was connected to a black magic monitor which allowed us to capture raw footage, compared to if we had filmed on the camera alone which would have compressed our video, creating noise in the image, which would make it harder to track.

For the cameras settings we set it up as a high shutter speed to avoid blurring and as low an ISO as possible, to avoid noise in our footage. When filming, it tends to make it easier when you have objects or clear lines to use as tracking markers, for our first shot we filmed just outside of the MHT building, the floor there is consisted of large tiles, therefore making it a good tracking location.

One thing that Jon recommend that we look into was the effect of a rolling shutter, something I am slightly familiar with already, as you can plainly see the effects of a rolling shutter on very fast moving objects such as the propeller on an aeroplane.

“Rolling Shutter, usually found in CMOS sensors is a method of capturing image that does not expose the entire sensor simultaneously, but rather exposes different parts of the sensor in different points in time.”

Effects-of-Rolling-Shutter-on-a-Propeller


An example of the effects of a rolling shutter

My next steps for camera tracking will be to attempt to track and composite the footage we filmed, once I can get hold of it later this week.

Final Output Guideline

For my final artefact, I now have to lay out the details of what shots will be included in the showreel.

Modelling Showcase

I intend to create two detailed models within Maya; a Playstation 4 Controller and a Canon camera lens. I decided upon these objects for two reasons, one being that both objects small granular details that will challenge my modelling ability, since the objects will need to be highly detailed so that they will hold up in extreme close up. The second reason being that the objects are readily available to me to use as a reference guide. I will then take these models, UV unwrap them, then texture them within Substance Painter. Once the modelling and texturing is complete, I will composite the models into a still image using Blender.

  • 30 Seconds
  • 360 view of both models – Wireframes and Textured
  • Still image render + Breakdown of Lighting and Shadows

Camera Mapping Showcase

For this section I will be mapping out a subway / train platform, I chose this environment since these areas tend to have a lot of sharp edges and different textures, which will help me when first lining up the perspective of the ground plane with the environment. I will map out and create the geometry for the scene, and then move onto baking out the textures and replacing them  edited versions or replacements made with Photoshop. Once this is all completed I will display the map by rendering a short camera move through the space.

  • 30 Seconds
  • Rendered camera animation moving through the map
  • Breakdown showing the untextured scene, the original image and the edited / replaced textures

3D Track / Matchmoving Showcase

For my matchmoving showcase I plan on using the footage recorded from a recent workshop with my tutor. I will display my track by showing overlaying markers / grids onto the footage, as well as creating a quick model to be placed into the scene to show the accuracy of the track.

  • Tracked footage overlayed with markers / grids
  • Model tracked into the environment

The final showreel should fall somewhere between the 1-2 minute mark, going by a conversation with Escape Studios, who informed me that this was the average optimal length for a showreel.

I will also be recording my full process through these shots, which will be featured on my blog upon submission.

Edge Work

To further progress my skills in modelling, I wanted to focus on a model which includes a lot of edge work, my feedback from my last meeting with my tutor when showing him the moonshine model was that my edges need work and that I should experiment more with my use of the edge loop tool. I found a video from Mike Hermes that fit this aim quite well. The tutorial also fit quite well with the aim of creating another, more complex model, which involved a lot of different geometry.

Aims

  • Improve my edgework within Maya
  • Test out lighting and rendering a complex object
  • Smooth my final model effectively after edgework

The modelling involved in this process was not too disimilar from my other work in Maya, what I will detail is my work with the edge loop tool as well as smoothing. The first part of the image I tried to smooth was definitely the most complex, the center wheel of the compass was quite difficult to get it to looko right when smoothed, but after experimenting with the edge loop tool I found the easiest method was to set it to ‘equal distance from edge and using the smooth preview to see the effect on the model.compass converted.mp4_snapshot_00.56.33_[2017.12.15_06.25.36]

Inserting my edge loops

compass converted.mp4_snapshot_01.04.52_[2017.12.15_06.26.15]

Finished Smooth Preview

It took me a short while to fully grasp how close an edge loop should be to the edge of the mesh, cloes enough so that it retains its shape, but not too close so that the edges are too sharp and don’t catch light properly. Once this was completed I moved onto smoothing the rest of my object in a similar manner, here is the finished result.

compass render edit

This was created using the Arnold renderer within Maya, overall I am very pleased with my progress in edge work, for my final output this will be very useful as when I render out and light my image, bad edge work will be very evident.

Further Steps

  • Use the skills learned in this exercise on my final output

Timelapse