Looking ahead to my final output, my tutor suggested that I look for inspiration in other’s work as a reference point for something to work towards, therefore, I have looked into a few showreels, industry talks and blogs to better illustrate in my mind what exactly I am going to produce.
A few simulations – Themrleoniasty
Overall, a very good showreel, it’s short and sweet, which is ideal since most hirers in the industry look for a 1-2 minute reel. Some very nice, simple looking simulations with a focus on photorealism, mainly focusing on particle simulations and viscous liquids. Also includes some pyro FX and volumetrics. Ideally this is the sort of video I would aim for as my final output , as it’s very to the point and displays a good knowledge of the software.
A great blog I found after looking for some write ups on procedural modelling. The blog itself is made by someone who spent a long time with Maya and decided to give Houdini a try, wanting to explore it’s procedural nature. Not so much a learning resource, but it shows a great amount of progress through using the software over a short period of time, through various experiments such as making a procedural building, rigid body dynamics and pyro FX. The blog itself hasn’t been updated in some years, but the posts that are there are very interesting and somewhat informative.
Ghost Recon Wildlands Terrain Tools and Technology
GDC talk regarding Houdini’s use in games, specifically the latest in the Ghost Recon series. Houdini’s terrain tools were used to great effect in designing the playable area at a fraction of the time and manpower since going procedural. While the talk doesn’t go into much detail about the actual tools used, the technology behind the game world is quite fascinating.
Taking my first steps in Houdini was somewhat more difficult than i had originally anticipated, as finding learning resources and tutorials on the subject was either non-existant or well above my current skill level. After a while of searching I found that the best beginner tutorials available were locked behind a paywall, after some deliberating I decided to go with the offerings on pluralsight.com due to the sheer amount of material they had available on Houdini.
After discussing this issue with my tutor, I was told to consider making my own basic tutorials to fill this gap, once I had become comfortable with the software.
Aims:
Learn the basics of the Houdini interface
Transfer over my existing skills in polygonal modelling
Get to grips with rigid body dynamics
Render out a basic scene
I followed along with the ‘Introduction to Houdini 15’ course featured on pluralsight which is roughly 7 hours long, overall, the series of tutorials in this course were incredibly helpful in breaking down the interface and various tools available in Houdini, and covered a wide range of topics and concepts. The only flaw I could find was that the series was made during version 15, whereas I was using V16, this caused a few minor problems along the way, but were quickly solved by turning to help pages and forums, most of these problems concerned tools that had moved in the interface or combined with another.
After getting the hang of the interface, the series moved onto importing an existing model of a car, which needed to be resized. It was explained that scene scale within Houdini was very important, what this means is that the units of measurement used for the size of a piece of geometry will have a large effect on dynamics and the results they produce. For example, using the same dynamic simulation on objects of two different sizes will yield different results.
Larger objects will appear to fall more ‘slowly’.
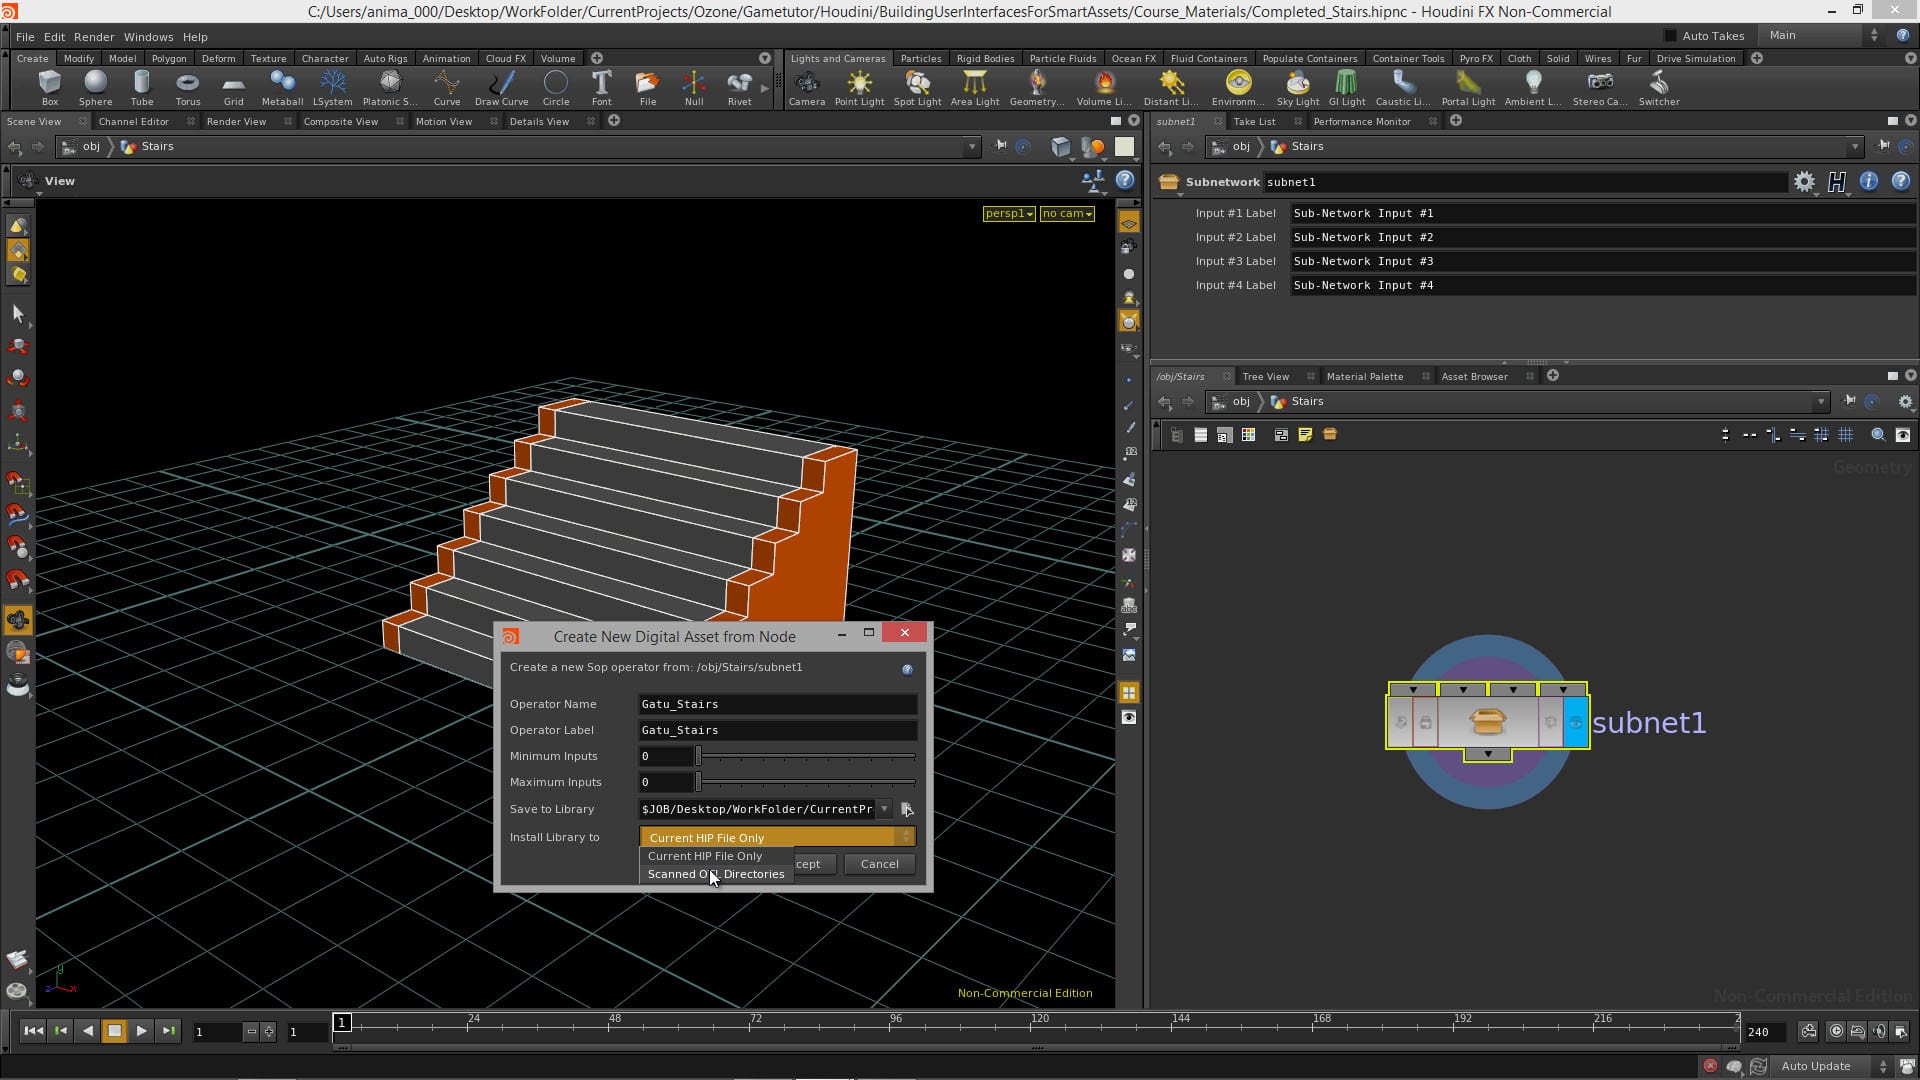
Moving onto some polygonal modelling, I began tidying up the car model, as well as modelling the wheels. One useful tool I found whilst doing this was the ‘slide on surface’ feature within the move tool, which enabled me to move and clean up my topology, without risk of distorting the shape of the model, something which would have been useful throughout my work with maya.
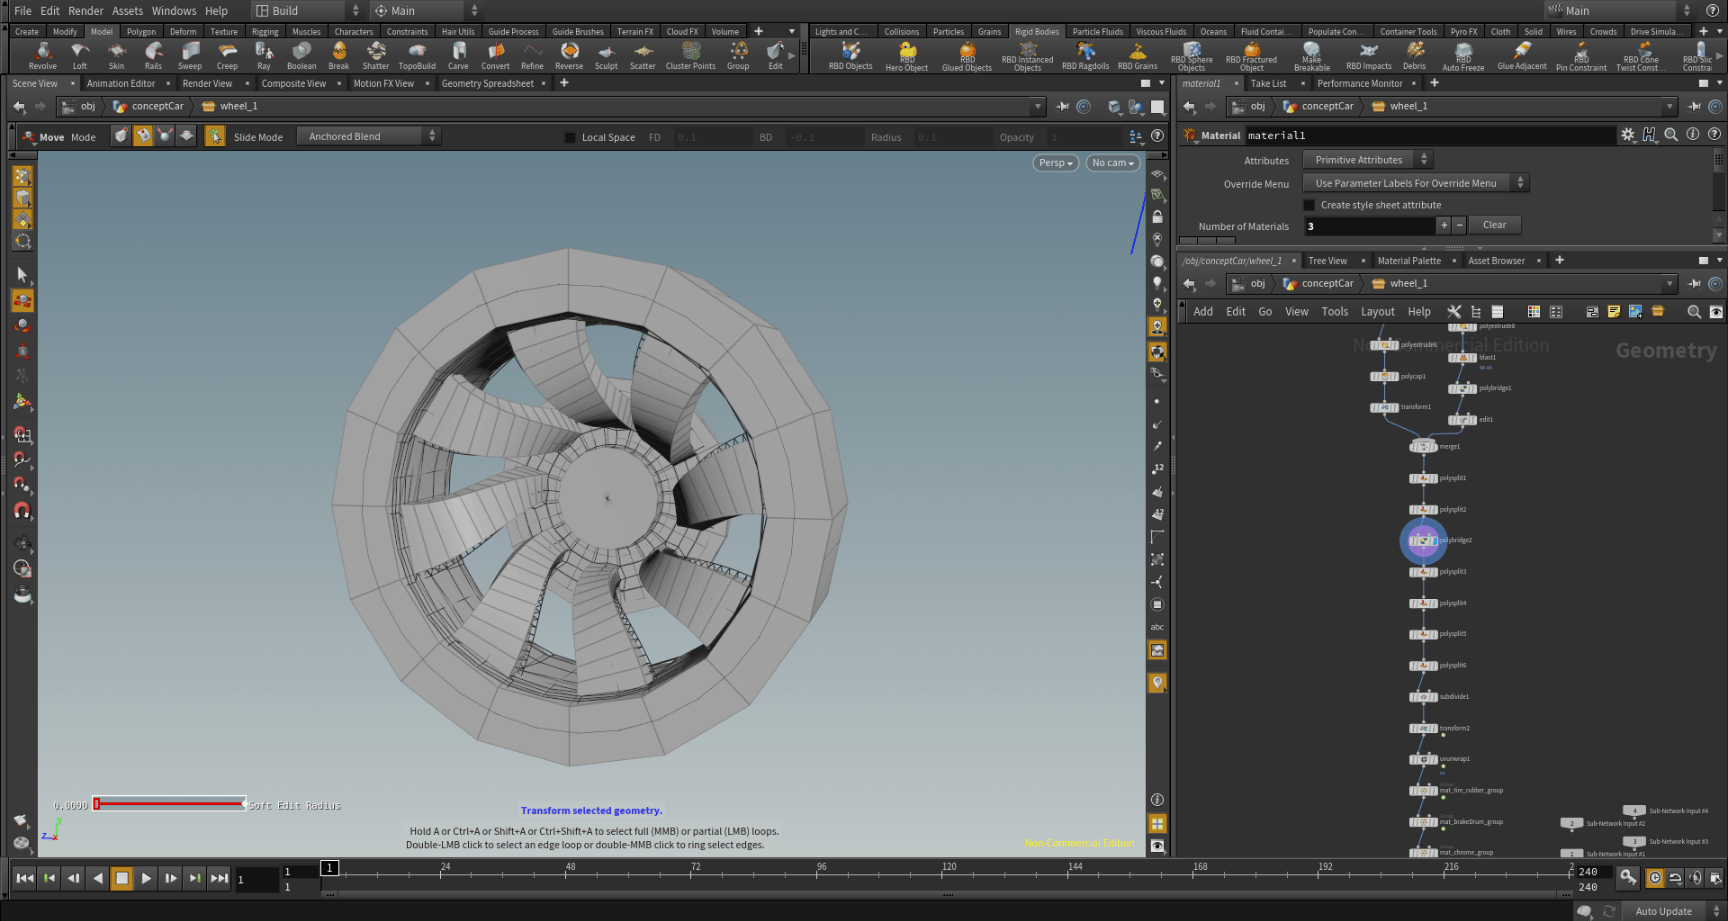
After this, I moved onto modelling the tires for the vehicle, it was at this point where the procedural nature of Houdini became apparent to me, whereas in maya, operations such as subdividing or extruding were destructive, in Houdini these operations are carried out in the node view and placed in a sequential order, then can be changed at will, no matter how far up they are in the hierarchy without causing any errors in the model. This was also very useful in cases where something did go wrong with the model, as I could simply work my way through the nodes and spot where the error was made.
The wheel consisted of roughly 30 nodes.
After playing around with some of the shelf tools to make the wheel, it was time to UV unwrap, having a decent amount of experience in this area from my time in Maya, I was prepared for quite a tedious process, but to my surprise, the entire process was automated and produced good results. I intend to research into this in some more detail, as I’m quite curious how this works.
Unwrapped wheel
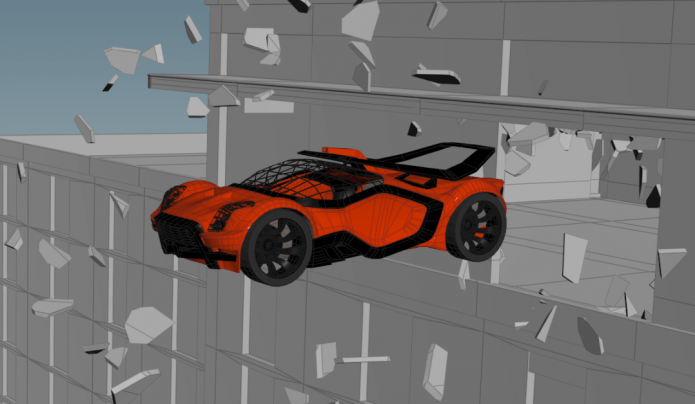
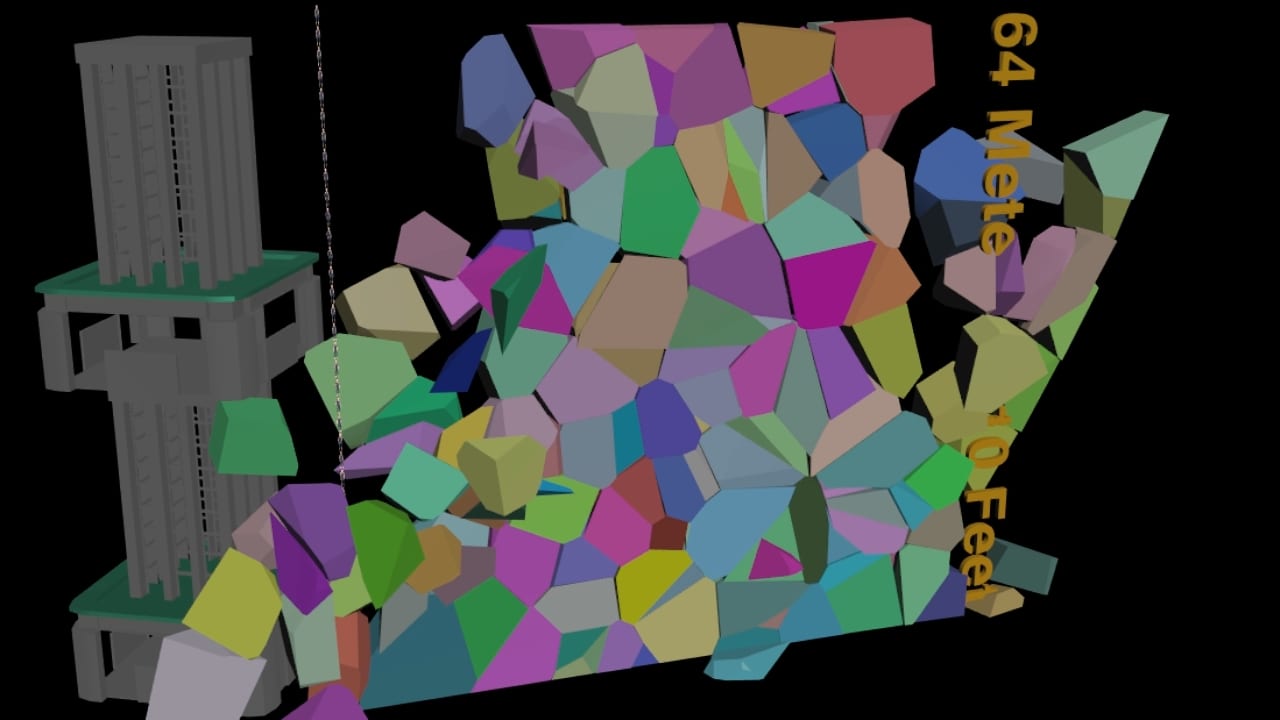
Last but not least was a quick dive into rigid body dynamics (RBDs) to create the final scene, overall , this was quite a basic attempt but turned out quite well. I took the existing building geometry and seperated a window pane by using the select primitive tool and then the RBD fractured object tool. Houdini does this by first converting the object to a volumetric fog, then selects random point as to where the object is to be fractured (The number of these points can be manually adjusted).
After this it was a simple process of adding a ground plane to act as a static object for the vehicle to land on, as well as the initial launching pad for the car. I then made the final car a RBD hero object, went into the DOP (Dynamic operators) network that these processes created, and added some velicity to the cars initial state so that it launched and broke the window with a good amount of force. I also altered the bounce and friction values of the car, as the first simulation resulted in the car giving off the impression that it was made of rubber. Gravity is automatically added when making RBD objects at its real world value of 9.8m/s down the Y axis.
I made a quick render of my final scene, which can be viewed below.
Next Steps
Begin to learn particles in Houdini
Learn how to best optimize my renders
Research into work I intend to take inspiration from
To build on the skills I had developed in 3D visual effects during the last semester and to produce a short 1-2-minute Showreel as my final artefact, with the purpose of expanding and improving my portfolio of work, to attain this I will be utilising Houdini FX, Maya, Photoshop and Substance Painter, as well as some work in Premiere Pro to compile my work into video form for my final artefact.
Objectives
• Further develop my skills within Maya, Photoshop and Substance Painter by producing a large scale, high poly model
• Fully texture and composite my model into a still image by utilising the Arnold renderer
• Build foundational skills in Houdini FX to create and render procedural terrains and simulations • Fully document my process for display on my blog
• Conduct research into the aesthetics and critical theory behind my work
Strand
I have decided to select the portfolio strand for this project, my reasoning behind this is that the research and development behind this project will be quite robust as I still have much to learn within Maya and Substance Painter, and also this will be my first attempt at learning the Houdini software package. Therefore, I would like a heavier weighting on my R&D rather than most of it being placed onto my final output.
Abstract
This project is intended to show further development into my modelling skills within Maya, as well as building a strong set of foundation skills in Houdini, mainly through experimentation with the robust set of shelf tools available within the software. The project will mainly consist of practicebased research as well as some critical theory work, which will then lead into my final Showreel
which will be my final artefact for the project. I will be sticking to a photorealistic theme throughout my work, as to meet the industry standards on what a Showreel should consist of. Whilst I have experience working with Maya and other modelling packages, Houdini and FX work will be something completely new to me, my reasoning behind wanting to work with Houdini is that it is currently very in demand within the industry, therefore I would like to get a base knowledge with the software, so as to better prepare me in case I work with it in a professional context.
Audience
The audience for this project will be both potential employers and educators in the VFX industry. My aims and objectives for this project are based on the role of CG Generalist, which typically requires knowledge of both Maya and Houdini, therefore I would like to show my learning capabilities and problem-solving skills in these packages.
Platform
A short 1-2-minute video of my compiled work which will be posted on Vimeo, as well as various screengrabs, sketches and time lapses of my work which will be hosted on my blog.
This project will extend my creative skillset by further building on my knowledge of the modelling process (Modelling, Texturing, UV Unwrapping and Rendering), as well as requiring me to learn an entirely new software package (Houdini) alongside of this. The biggest challenge of this project will certainly be learning Houdini, which has a notoriously high learning curve. Whilst this will be a difficult process with certain failures, I intend to use these problems as a learning experience as well as developing my problem-solving skills at the same time.
For semester B, I wanted to use my experiences and knowledge gained from my previous project to dictate where i was to place my efforts going forward. While I did enjoy my work in modelling with maya, I wanted to further branch out into 3d and try my hand at something similar whilst also wildly different and experimental.
Recalling a conversation late last year with escape studios, one of the key points made was that currently, the industry is looking for FX artists, more specifically people trained in Houdini.
The Houdini interface.
After some initial research into the Houdini software package i found where it differs from other 3d packages is that it focuses on procedural generation. Whilst standard modelling tools and procedures are available within, where Houdini shines is its ability to produce complex dynamics, particles and volumetrics, which are typically used to create simulations (E.g, Fire, smoke, water, Etc.)
Looking into a few houdini showreels, it becomes apparent just how powerful the software is.
Doing some research into the learning process, which will take up most of this blog, according to various VFX forums, Houdini a notoriously complex piece of software to learn. Employing the fail-fast approach from last semester, I will begin immediately working with the software and attempt to have at least one output, no matter how small at the end of each week, failing this I will go into detail what exactly didn’t work when trying to achieve this goal.
Thinking towards an output, I have considered at this point making a compilation of simulations made within the software which I will work on throughout the coming weeks, working on my feedback from last semester I will try to include all of my experiments within this output.