Modelling Progress #2

Continuing my progress with modelling within Maya I decided for my next step I wanted to work on a model with a more complex shape, which would encourage me to use some more of the modelling tools within Maya.

Aims

  • Create a more complex model within Maya
  • Full texture model, utilising material editors in Substance
  • Learn how to UV more complex shapes

After searching around on YouTube I came across another Mike Hermes tutorial, which focused on the creation of a moonshine jug, I liked the idea of creating this object as it would enable me to use a few more tools, especially when creating the handle, which seemed like more of a complex section to model, this tutorial also included the process of texturing with Substance Painter, which was usesful to me as it followed my exact workflow. As well as all this the tutorial goes quite in depth with UV unwrapping, since this is a more complex shape this was also very helpful.

In terms of process, the model started off relatively simply, taking a cyclinder and extruding the faces to create the underside of the jug as well as the lid and mouthpiece, once the intial shape was blocked out I then started adding in some edge loops onto the edges of my models so that they retained the shape of the edge upon smoothing.

jug.mp4_snapshot_00.11.25_[2017.12.15_02.16.36]

After this I moved onto creating the handle for the jug, the way I did this was by using the bridge tool within Maya, I deleted two of the faces on the lid of my model and then played around with the settings of the tool until it achieved something that I liked. Once I had smoothed my model, I then I went onto modifying my handle by utilising the soft select tool and scaling edge loops on the handle, this is what enabled me to create a hand crafted look for the handle.

jug.mp4_snapshot_00.55.07_[2017.12.15_02.25.33]

Finally for the modelling I did one more pass over all the edges to make sure they were looking good, adding in edge loops where they were needed, once all this was completed I moved onto UV unwrapping my model ready for texturing. For the sides of the jug they way I unwrapped them wa by using the cylindrical projection tool under the UV menu, I then added some UV cuts along the side of the model as well as two cuts where my handle joined onto the lid, once I had all my UVs blocked out, I used both the unfold and cut & sew tools to straighten out the UVs until there was no stretching that would distort my textures.

jug.mp4_snapshot_01.40.49_[2017.12.15_02.37.40]

Now that the Maya section of this exercise was completed, I exported my mesh as an .obj file, and imported it into Substance Painter. Because I had seperated the lid and base of my model it was relatively easy to apply two different materials to these sections without having to toy around with the selection tools within Substance Painter. The textures of my model consisted of some smart materials within Substance, I applied a copper material to the top of my model and changed the color to my liking, as well toying around with the metallic and roughness settings. I then did the same for the base of the model, using a similar material but toning down the metallic slider and raising the roughness, so that the top of my model would be reflective but the bottom would would have more of a matte, rusted look. Finally, I painted a few X’s onto the side of the model, just to certify it as a moonshine jug. Once I was finished with all this, I uploaded my model and textures to sketchfab, ready for display.

My final textured model can be found here.

Overall I am relatively happy with this model, the only glaring issues I found is that the handle of the jug has a few sharp edges, I realise now that this was down to the fact that I continued to extrude and move the edges of this section after I had smoothed the model, which caused it to lack vertices towards the top of the handle, creating a bad sharp effect, in the future I will have to remind myself to either do another smoothing pass when editing my mesh or alternatively just use the previewed smooth option until the very last edit. The other issue I found was that towards the base of my model some of the edges were quite sharp and not catching light properly, moving forward I would like to work on a model that will enable me to learn a little more just how edge loops work to effect the edges of my model upon smoothing.

What I learned

  • How to create more complex, organic shapes within Maya
  • Further techniques in UV unwrapping my models
  • The way mesh tool options work within Maya

What I need to Improve

  • My smoothing workflow when creating complex shapes
  • How to properly utilise the edge loop tool when creating smooth edges to catch light

Timelapse

https://www.youtube.com/watch?v=jlJNNfOudPA

Compositing Progress

Aims

  • Test Arnold / Maya software for my compositing workflow
  • Add geometry to my camera mapped scene and light it realistically to integrate it into the scene

For this process I ran into a fair amount of problems, but to start it went fairly well, until it got to rendering. The geometry I added to the scene was already correctly placed, since the grid was already in line with floor plane from when I was originally configuring the original camera map.

Maya light fail.flv_snapshot_02.58_[2017.12.15_04.51.48]

After this I moved onto adding some lights, instinctively I positioned the lights where light was already emanating from the image, one bright light at the top, and two slightly dimmer light in place of where the reflections on the tunnel wall were.

Maya light fail.flv_snapshot_10.47_[2017.12.15_04.54.57]

This was the result, I was (and still am) quite confused by this result, I tried to render in every renderer within Maya including Maya Hardware and Arnold but to no avail, I assumed this occurred since the lighting in my camera map came from the image itself, or that maya did not recognise the map as an actual piece of geometry.

Due to this confusion, I then thought that I could export the camera map as it was originally, place the footage into Blender, 3D track the scene, and then place some geometry into the track and composite the lighting and shadows that way.

Unfortunately, i soon learned that tracking a camera map is incredibly difficult since details in the scene don’t shift perspective with the camera, they just distort and stretch, I only managed to get 3 markers to stick to the footage after around a half hour of trying.

After all this I decided to simply go back to Maya and attempt to add some geometry to a still image, and add the light and shadows in Arnold. I managed to get a decent looking composite after a short amount of time, which can be seen below.

Maya Light.flv_snapshot_16.18_[2017.12.15_04.55.34]

I spoke to my tutor and decided that I would wait for an upcoming workshop on tracking and compositing, where I will attempt this process again in Blender. As it turns out, according to various message boards in the Maya community, quite a few people are experiencing problems with Arnold not rendering lights correctly in its current release.

What I Learned

  • Tracking a camera map is very difficult
  • The basics of compositing lights and shadows onto a still image in Arnold

What I need to improve

  • How to properly composite my camera mapped scenes
  • The differences in light types in Maya / Arnold

Timelapse

https://www.youtube.com/watch?v=AXK59BKcN9g

Texturing Progress

Aims

  • Reacquaintance myself with Substance Painter
  • Fully texture a model
  • Utilise my knowledge of how to create realistic wear and tear on my textures
  • Export my textures to Sketchfab for display

As part of my workflow i decided early on that I would be using Substance Painter, mainly due to the fact that I have had some prior experience in the software and also that I found that skills I had already learned in Photoshop (Such as layer stacking and masking) were easily transferred into this software.

Whilst I have already textured some models as part of this project, I hadn’t gone into too much depth with the software and mainly just applied a material and exported.

For my process I started off by using a steel smart material as the base of the gun, and turning off any preset effects within the material, such as scratches and dirt, with the intention of tweaking these to my liking later on.

gun ssub.mp4_snapshot_00.29.47_[2017.12.15_04.59.21]

Next, I began adding some more materials to the gun and using a mask as well as the polygon fill tool to only apply it to certain parts of the gun, such as the barrel and grip.


Once I was happy with the placement of my materials, I then moved back to tweaking the smart masks and generators within these layers, to try and give the gun a weathered, used look in areas where they logically would appear.

gun ssub.mp4_snapshot_01.29.43_[2017.12.15_05.00.35]

I came across an interesting way to achieve this by duplicating a base metal layer, placing it underneath itself, and then slightly darkening its color, giving it a water eroded type effect.

gun ssub.mp4_snapshot_01.53.40_[2017.12.15_05.01.19]

Overall, I was very happy with how this went, in terms of texturing my models, my mind is at ease simply due to how intuitive the software is.

The final textured gun can be found here.

What I learned

  • How to create detailed textures and weather them realistically
  • How to effectively use masks and generators on my materials
  • Various shortcuts and keybinds within the software

What I need to improve

  • Creating my own effect layers to a high standard
  • How to paint directly onto my baked maps

Overall, the tutorial is very ideal for beginners or those looking for a refresher on the software, i’ve already recommended this video to a few of my peers. The only downside is that while it does cover most of the software’s features, it doesn’t go into much depth and is more of just a basic introduction.

Timelapse

https://www.youtube.com/watch?v=cs-ExYEGsdk

A Call with Escape Studios

Sometime last week I had sent an email request to Escape Studios, a London based VFX school, asking for some advice regarding my options once I graduate this year, after some back and forth I managed to organise a Skype call with one of the tutors there. The call itself was about 30 minutes long and contained some useful information for my final output this semester.

I found out that when it comes to employability within the VFX industry, it’s typical for the graduates tend to start out in the runner role when applying for jobs in one of the big 5 VFX companies, with Escape graduates tending to be put towards the top of the ladder during the hiring process, which is especially beneficial as runner roles are highly competitive. Runners are split amongst different departments, depending on what they want to specialise in (FX runners, Modelling runners, Texture runners). When applying for smaller companies, new hires tend to be put into the matchmover role and once they’ve been trained enough, move up to a junior artist. While the runner role is highly sought after, it is seen more as an internship rather than a full time job, typically people tend to stay in a runner role for 3-6 months, depending on the department and training required. According to my contact at Escape Studios, the industry is looking for a lot of FX artists, especially those familiar with Houdini, and runners applying for that department tend to be trained very quickly due to this need.

After I felt like I had enough information regarding employability, I then asked what they would typically look for skills wise, when accepting students to study at the college, I was told that they specifically look for realistic models, as well as a camera track to show a baseline ability, he said that typically people will model a chair and then track that into some footage and that would suffice to gain entry into the school. Obviously this ramps up when applying for a career within the industry, upon graduating from Escape the teachers will continue to support you with your showreel.

Reflecting upon this call has definitely changed some of the ideas regarding my final output for this semester, instead of going with a Sci-Fi themed model I would now like to focus on real world environments and objects to showcase my ability.

Camera Mapping Progress

Another skill I wanted to learn for this semester was Camera Mapping within Maya, Camera Mapping (or Camera Projection) is basically transforming a 2D image into a 3D environment which can be explored through camera movement. After speaking to my tutor I set out to find some tutorials that would help me learn this skill

Aims

  • Create a camera mapped scene from an image found online
  • Animate my camera to explore the mapped scene
  • Render out my animation for future use and display
  • Evaluate the quality of my camera map

One of the difficulties in finding tutorials for this was that most of those suggested by YouTube were often on earlier versions of Maya, or as I found, linked to project files that had long since disappeared. After some searching I found a very useful video from Matthew Randall.

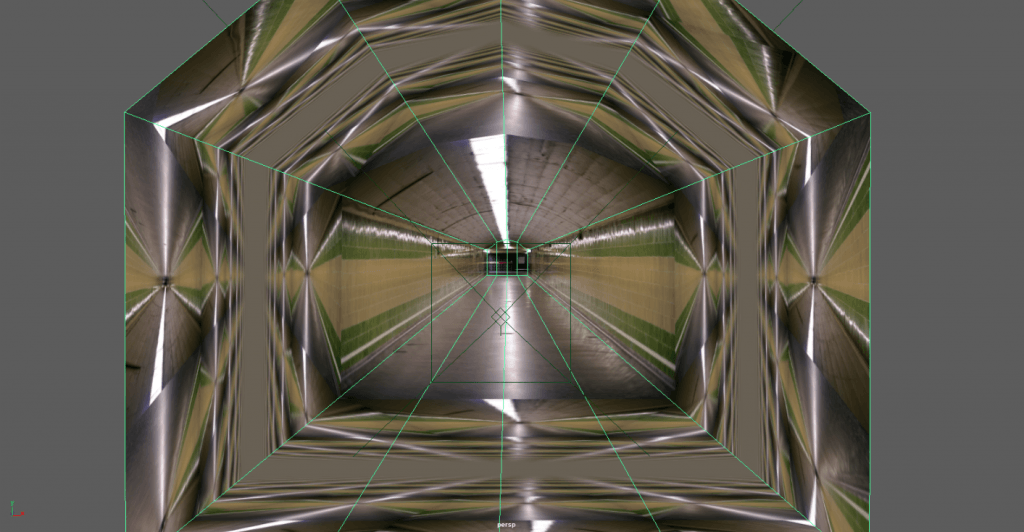
 The tutorial follows along the basics steps of mapping out a tunnel, creating the perspective camera, adding an image plane, matching the perspective and geometry to the image and then mapping the the image onto the geometry created. The tutorial also contained some useful functions of the camera such as altering the sensitivity of the tumble and track movements as well as how to enable the undoing of camera movements. It was very easy to follow along with and really helped me to grasp the basic functions and tools required for this practice.

WIP CAMERA MAP

Linked below if my final rendered camera map, I was very pleased with the results but found that whilst the tutorial walked through the basics, it was a very simple geometry required to carry out the map, for the future I plan on researching further into this practice by attempting it with a more detailed scene that includes a wider array of geometry and objects. 

https://www.youtube.com/watch?v=mTmnfNbSYYQ

Upon showing my work to my tutor, he made the suggestion that I should look into tracking my footage, adding some primitives to the scene and then have an attempt at adding lights and shadows to the geometry to match the scene.

What I learned

  • How to match the perspective of my camera to my image
  • How to align my geometry to the image
  • How to then map my image onto the geometry itself and light it correctly
  • The basics of camera animation and rendering

Further Steps

  • Create a more detailed camera map from a more complex image
  • 3D track my footage and add geometry
  • Attempt to add realistic lighting and shadows to the geometry to match the footage